Using a Simulator for Currency and Proficiency
Using a simulator is great at skill-building and even meeting legal requirements, but it is not the same as flying in IMC!
I highly recommend simulator usage, but in addition to…not a replacement of…IMC flying!
Currency (Legal Definition)
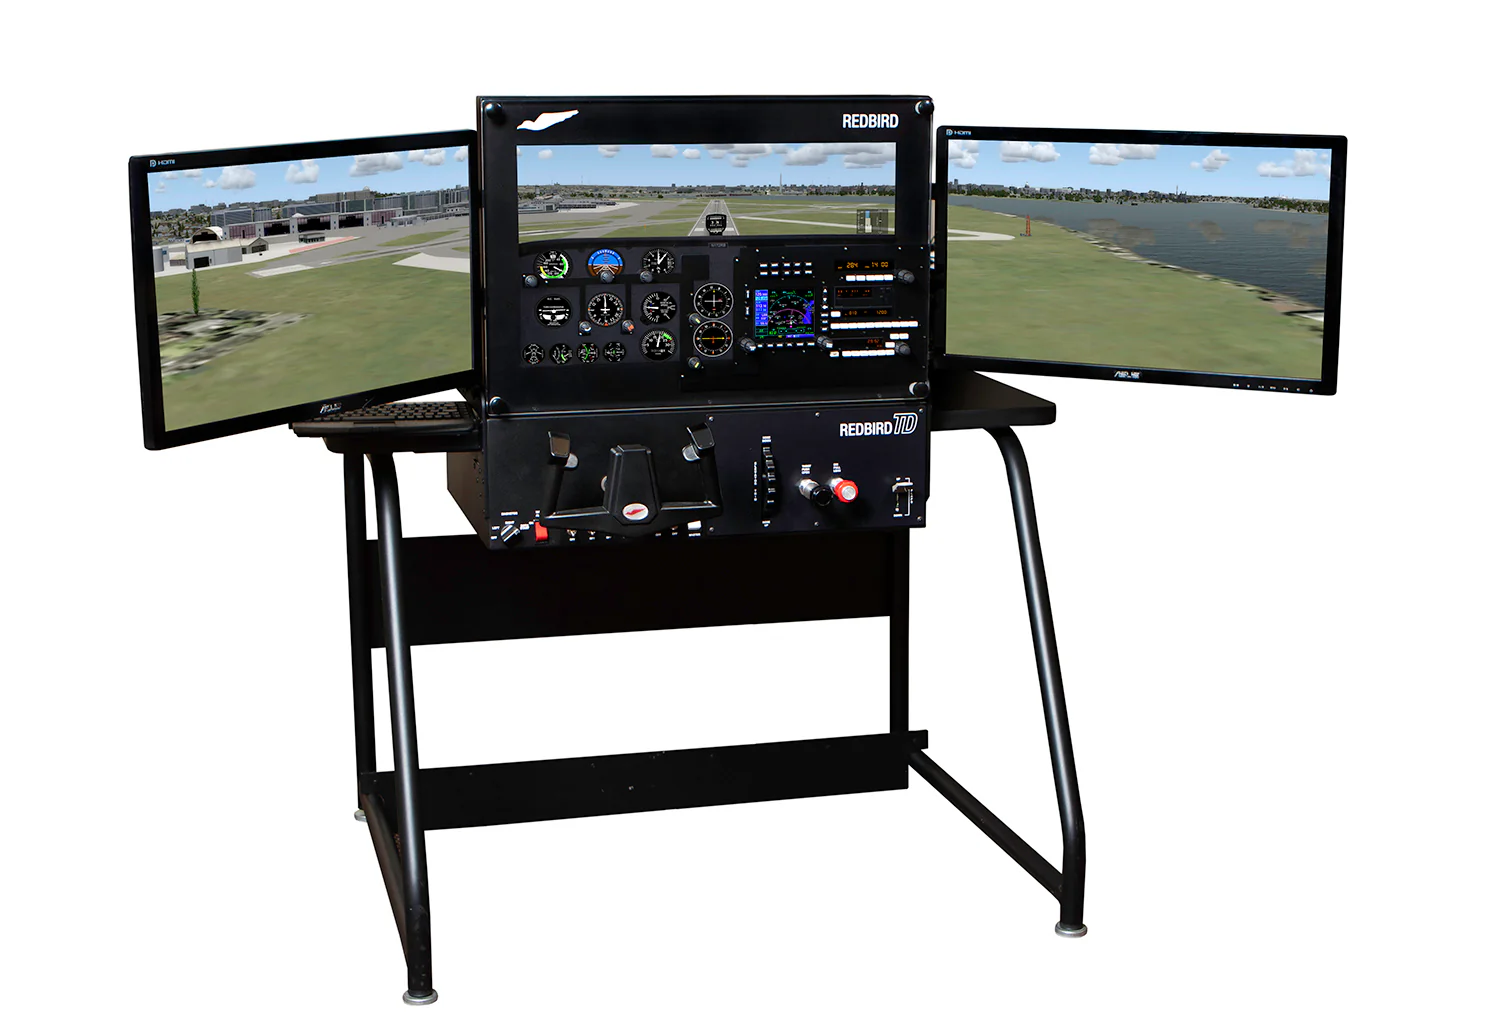
- FAR 61.57(c)(2) allows use of an aviation training device (basic or advanced) to maintain instrument proficiency.
- The device must be certified and you should review the letter of authorization to know what is allowed by the FAA to be completed on the device. (Example: Redbird TD-1 Basic Aviation Training Device LOA)
- FAR 61.57(c)(2) (as of 2018) allows you to maintain instrument currency without requiring an instructor in this manner.
- My recommendation for proficiency: (this is my opinion only)
- Training the body to react correctly to spatially disorienting sensation only occurs in the aircraft in IMC (or in a really good hood especially at night). I recommend flying frequently in IMC with a published missed approach (since it involves turns and climbs) often even if using a simulator for most proficiency requirements.
- While using the training device, I recommend flying without the moving map or GPS to determine your proficiency with "raw data."
Proficiency (Skill, not legal-based)
I am a huge fan of home simulators. You can get really good at IFR procedures and navigation, even though it may not be “loggable.”
- Home simulators are more capable than certified in many cases (becauase they dont require burdensome oversight), but not legal for proficiency.
- My $29.95 X-Plane 11 software with a joystick is phenomenally capable.
- With my ipad, I can hook up to a G1000 Nxi simulator or Avidyne IFD 540/440 simulator for the actual avionics I use day-to-day.
- The graphics, weather engine, computer speed, and simulation is better than the certified device I access (and pay for).
- Bottom line: My home X-Plane is incredibly valualbe for building proficiency and actual swtich manipulation, but it is not certified and can not be used to log any proficiency.
The Missed Can Kill You
We often "skip" practicing and preparing for the missed. Yet, this vital skill can cost you big time when you least expect it.
Don't Look Down (Instead: Memorize 1st 2 steps)
- If you need to look down at an approach plate at the crucial moment when you’re low and need to maneuver, you’re inviting spatial disorientation.
- Your focus at the Missed Approach Point should be: (1) Power, (2) Attitude, (3) Configuration while
- Flying the heading and climb focused on the attitude indicator (with instrument cross check)
- KNOW THE FIRST TWO STEPS of the missed
- Rehearse them out loud during the final approach segment (Climb straight to 1200, turn right to 240 for radial intercept)
- You can look at follow-on steps again once stable on a heading
Spatial Disorientation: Simultaneous Power, Climb, Turn
- You're low to the ground, tired, nervous, looking for the runway and need to substantially change the plane's trajectory
- Then you add full power, pitch up, and likely turn, inducing all the aeromedical factors inducing spatial disorientation
You're biased towards landing and unprepared
- Frequently call out altitude and floor (800 feet for 380…) to mentally trigger the events
- Rehearse on final approach as disucssed earlier (at 380, full power, climb to 1200, turn to 240)
You start it early
Reference: AIM 5-4-21
- Obstacle protection is based on starting the missed approach AT THE MISSED APPROACH POINT (and at or above MDA/DH)
- No consideration is given to an early turn.
- When an early missed approach is executed, fly the approach to the MDA (unless otherwise cleared by ATC)
- You can absolutely climb early; just don’t turn early
-
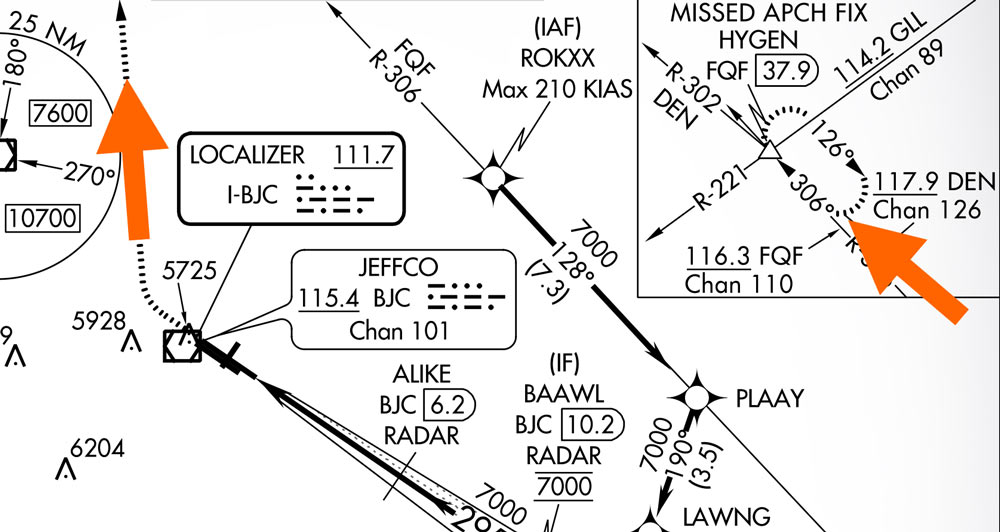
ILS where early missed is trouble
: If you execute a left turn on the 6100 foot leg, you’ll head straight for mountains.PDF Viewer
My advice: Practice
- On a IFR day, fly a “higher minimum” approach like a VOR or circling approach somwhere that keeps you in the clouds at MDA → you get an actual missed approach
- With a safety pilot, fly a full approach with the missed at night to get the effect of spatial disorientation.

CDI and HSI Needles During a Back Course
There are a few simple rules to follow:
CDI (Your normal VOR/LOC CDI Instrument without the Compass)
- Rule 1: If you’re off course on a localizer or a localizer back course approach, and you’re on the side of the localizer feather on the chart that has the shading or other differentiation, the course deviation indicator (CDI) will swing to the left. It doesn’t matter where you’re headed or what you’re doing—if you’re on the shaded side of the feather, the CDI is to the left. Period.
- Rule 2: If you’re inbound on the front course, or outbound on the back course, the shaded part of the feather is to your right and you correct by chasing the needle. If you’re inbound on the back course or outbound on the front course, the shaded part of the feather is on your left, so you correct by steering away from the CDI.
- EXAMPLE:
KGFK LOC BC RWY 17
PDF Viewer
- At the green location:
- Rule 1 says needle is to left (no matter which heading we're on)
- Rule 2 tells us that you correct towards the needle (turn left) outbound and away from the needle (turn right) inbound.
- At the orange location:
- Rule 1 says needle is to the right (no matter which heading we're on)
- Rule 2 says correct to needle (turn right) outbound and away from needle (turn left) inbound.
- At the red location (front course side):
- Rule 1 says needed is to the left (no matter which heading we're on)
- Rule 2 says correct toward needle (left) inbound and away from needle (right) outbound
HSI
- Always tune your HSI to the FRONT COURSE heading and "fly to the needle" to get back on course just like normal
QUIZ
Answer the following for this approach: KASE LOC/DME-E- At the green location, which way does CDI deflect and which way do you correct?
- Rule 1: White side deflects right
- Rule 2: Inbound on front course: Correct by chasing needle (turn right) (normal ILS)
- At the red location, which way does CDI deflect and which way do you correct?
- Rule 1: White side deflects right
- Rule 2: Outbound on BC: Correct by chasing needle (turn right)
- What course do you dial into the HSI to get "normal sensing" on the missed approach?
- Course 303 — ALWAYS dial in the front course heading
- NOTE: The "front course" of this localizer is to the northwest (heading 303)
Further Reading
This topic can be difficult, so here's a bit more to deep dive this topics:- How to Fly a Localizer BC - BoldMethod (CDI and HSI illustrations)
- IFR Magazine KASE Deep Dive
- IFR Magazine Reverse Sensing Article

Impromptu Holding
Unexpected holding instructions can send you into a bit of a spiral.
Can you visualize this unpublished hold if it’s fired at you out of nowhere?:
"Cessna 123 hold west of the East Texas VOR, 290 radial, 20 DME, left turns, 5-mile legs. Expect further clearance at 12:30 Zulu."
NOTE:
- You actually head EAST on the inbound leg when you are told to hold WEST
-
5 NM is not the inbound leg distance, but 25 NM is the distance from the ETX VOR fix when your outbound leg is terminated

If you weren’t ready for that, then recommended refresher reading:
- Holding Procedures, Explained (BoldMethod)
- Holding (Aeronautical Information Manual)
- Any of many articles or videos on holding and pattern entry online

NDB and VOR Bearings Only Approaches
This is pure IFR and situational-awareness skill building.
NDB-only approaches without moving maps or GPS are nearly obselete, but your ability to fly one on raw NDB (or VOR) signal alone with wind correction indicates a high level of IFR skill.
Here’s my challenge to you:
- Fly a NDB appraoch with a course reversal, and outbound and inbound to NDB, and an NDB-hold with wind correction
- Alternatively, if you have a HSI with a bearing pointer (or an RMI), use that to fly a VOR approach without the CDI. This is the exact same skill.
I like to exercise a challenging NDB approach on a BATD for IFR proficiency at least once a month (no moving maps)!
If you need a refresher (of if “push the head, pull the tail” doesn’t ring a bell), I like Flight Insight’s NDB approach refresher

Fly the Numbers (No Guess and Needle Chasing)
When flying instruments, you want the airplane to perform as desired without delayed response or input “guesses.”
When you want to maintain a specific speed, descent/climb rate, level off accurately at altitude (i.e., MDA), you just apply one correct input and monitor.
You develop this for your aircraft VFR and practice until it works well for you.
Example flying this way in a Cessna 172:
- Cruise at 110 KIAS
- Drop 350 RPM (maintain altitude) to get 90 knots for approach (now trim for 90 knots)
- Drop 300 RPM (maintain 90 knots) — 3°/500 fpm (ILS-type) descent
- If you're a little low add 50 RPM; a little high, remove 50 RPM
- Add 300 RPM back (maintain 90 knots) to level off at MDA
- Based on C172 rules of thumb you can get flying or reviewing the POH
- 100 RPM (maintain altitude) changes IAS by ~6 kts
- 100 RPM (maintain speed) changes descent rate by ~ 1°
Explanation
I didn't come up with this method, but I will vouch for its efficacy. I can nail the GS or descent angles on approahces at my desired 90 knots with not much thought — leaving me free to navigate and think about the upcoming milestones.- See By the Numbers (Thomas Johnson, CFI) for a good explanation
- John Eckalbar's IFR: A Structured Approach (and some of his other books) explain the methodology in detail
Some Aircraft Numbers
NOTE: These are specific to each airplane, but this can get you a starting point:
- Cessna 172
- Cessna 172RG
- Beechcraft Baron
Visualize Your Route and Approach
With today’s tools, you can (should) chair/computer fly any route before executing it!
This is compelling in any new environment and any areas with terrain concerns.
- Google Earth offers the capability for free
- Foreflight offers this in their upper tier plans
Google Earth — Free!
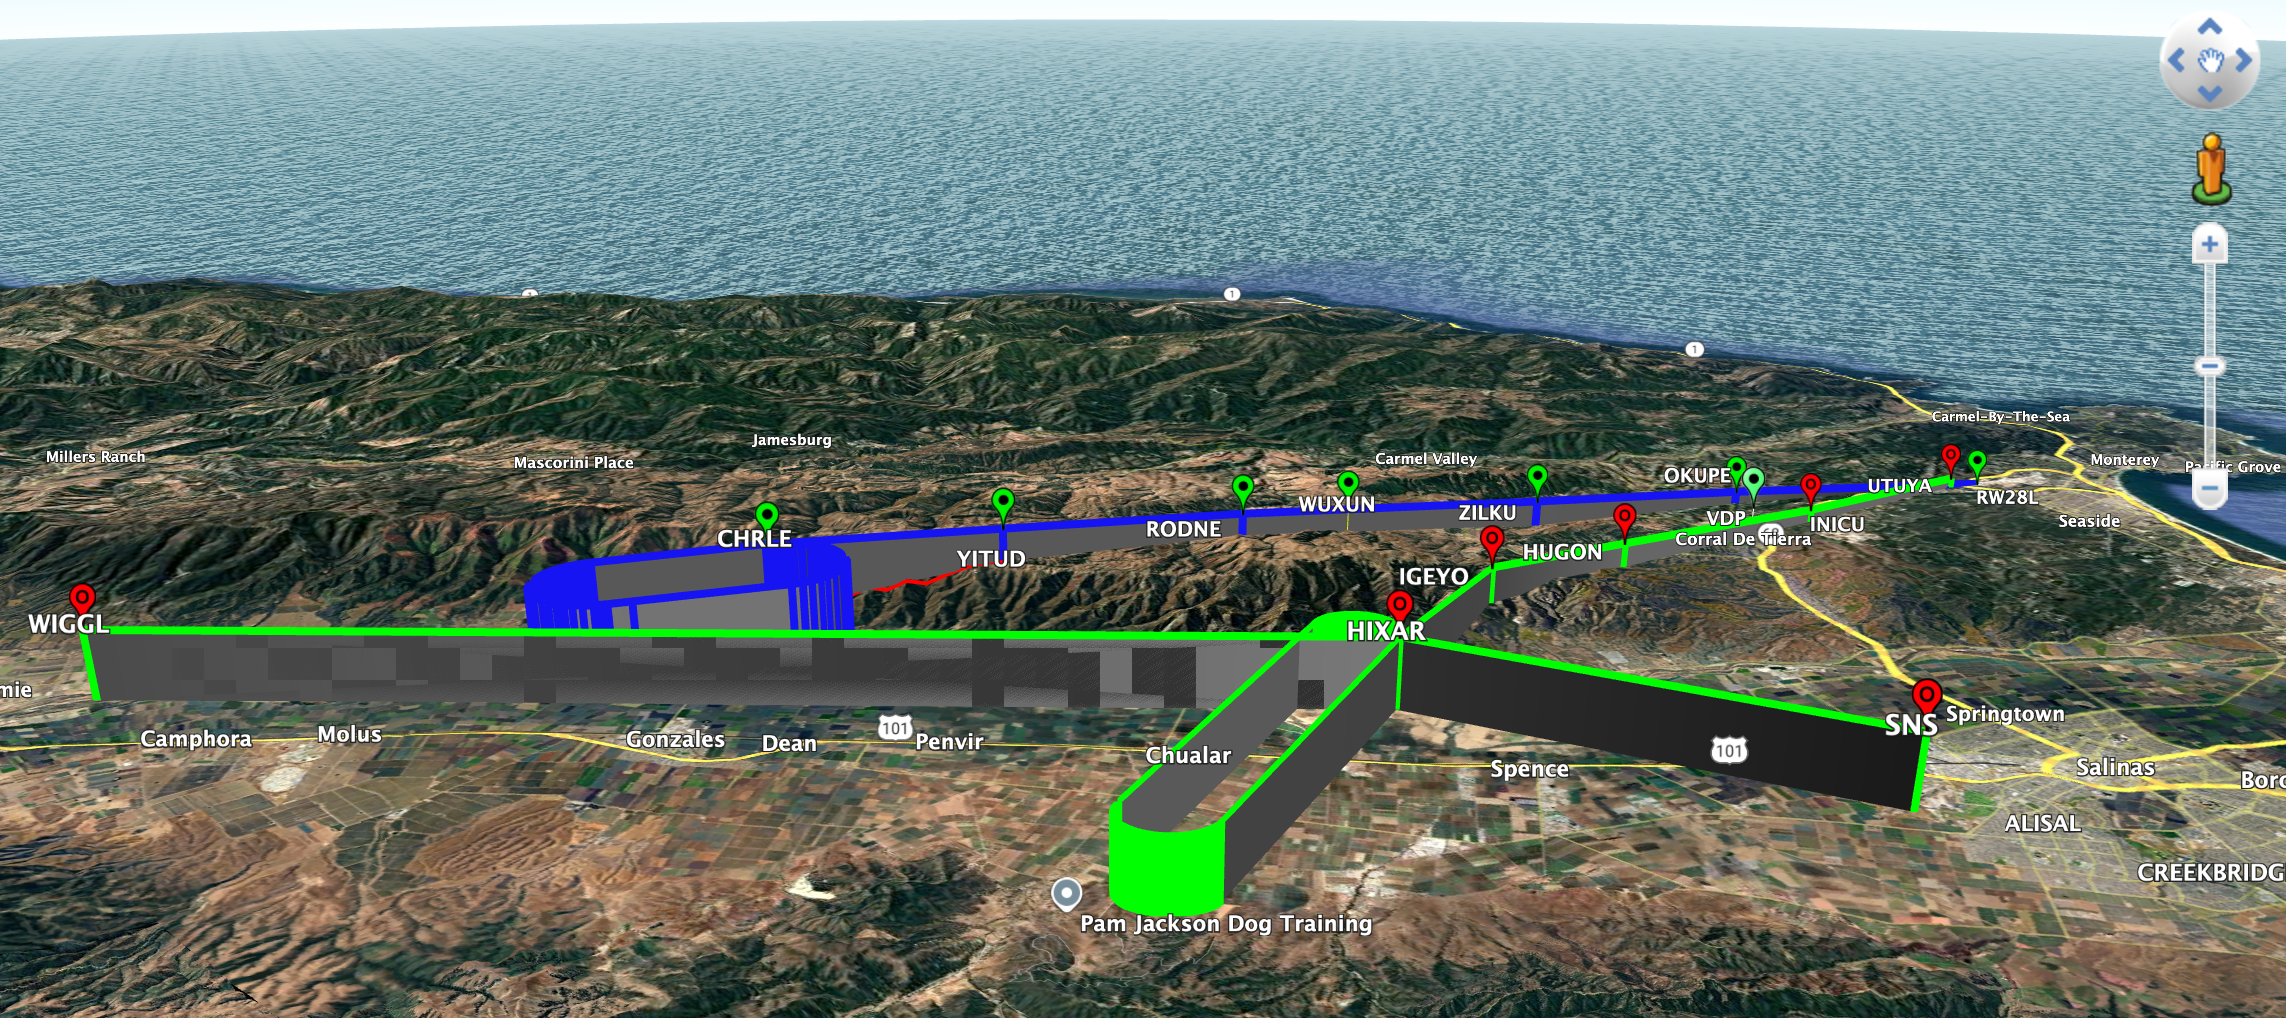
Google Earth is my favorite because it’s free, .kml files are easy to transfer and share (and you can import them into Foreflight), and I have a lot of power to manipulate the data in addition to very powerful zooming and rotating the Earth.
You can make it easy with just a few points on your route of flight (requires a few entries of data in Google Earth) or intricate (as shown below) with changing altitudes and all waypoints. (This requires computer programming effort)
- You can plot the navigation waypoints for any route by entering them.
- Plotting the route as pictured with lines at changing altitude is possible but takes a bit of manipulating the underlying .kml file
- Plotting the holds as shown took some computer programming in PYTHON assuming a 90-kt hold
- Placing the cursor over any point on your route will show the actual elevation along the route
- You can "fly" the route from cockpit view and altitudes using the "Play Tour" feature
Google Earth (.kml Files) for Visualization
Here's some examples for you to look at out of the terrain-surrounded Monterey, CA airport (KMRY).Please note that there are layers that are selectable so you can turn off sub-routes and points.
These should download as .kml files (open in Google Earth).
MRY Standard Instrument Departures
- There are three departures you can turn off and on
- MRY5 from Rwy 28L
- MRY5 from Rwy 10R
- TORO7 (only allowed from Rwy 10)
MRY Approach Procedures from West (over mountains)
- There are three approaches you can turn off and on
- LOC 28L
- RNAV-Y (GPS) 28L with transitions
- RNAV-Z (RNP) 28L
MRY to KWHP (LA area) trip with multiple routes
- Select one of the three departure routes — they're all on by default
- Select one of the two routes
- V25 and V386 requires the layers SNS_V25_RZS and RZS_V386_FIM
- T259 and T263 requires the layers SNS_T259_AVE and AVE_T263_FIM
- You can select the points layers as appropriate for the route
- Note that the segements are color coded:
- Red: Departure
- Green: Enroute
- Cyan: Approach
- Yellow: Holding